


Understanding the roof insurance claim process before disaster strikes can save Bellevue and surrounding areas homeowners time, money, and a lot of stress. Most people don’t think about how an insurance claim actually works until a hailstorm or windstorm leaves their roof damaged. By that point, the wrong move in the first few days can cost you thousands. The good news is that the process follows a predictable pattern. If you know what each step looks like, you can stay in control and make sure your roof gets repaired or replaced the right way. This guide walks through the 7 steps of a typical roof insurance claim and what to do at each one.
- Where to start: What to do in the first 48 hours after a storm.
- What each step looks like: A clear walk-through of the claim process.
- What to watch for: Common pitfalls and how to avoid them.
Why Does the Insurance Claim Process Feel So Confusing?

Insurance claims involve a lot of moving parts. Adjusters, deductibles, depreciation, replacement cost, actual cash value, supplements, and final payouts all come into play. Add in the stress of storm damage and pushy door-knockers showing up the same week, and it’s easy to feel overwhelmed.
What’s the First Thing to Do After a Storm?
The first thing to do is breathe and document. Take photos of any visible damage from the ground, save weather reports for the date of the storm, and check inside your attic for daylight or water stains. Don’t climb on the roof. The National Association of Insurance Commissioners advises homeowners to notify their insurance company right away after damage occurs, since reporting timeframes vary by state and policy (Source: NAIC – What You Need to Know When Filing a Homeowners Claim). Before you call, take 30 minutes to review your policy’s declarations page so you know your deductible and whether you have replacement cost or actual cash value coverage. Both numbers shape what to expect from the claim.
- Document fast: Photos, weather reports, attic check.
- Don’t climb up: Use binoculars from the ground.
- Read your policy: Know your deductible and coverage type.
- Report promptly: Reporting deadlines vary by state and policy.
What Are the 7 Steps of the Roof Insurance Claim Process?
Below is the numbered breakdown of how the roof insurance claim process actually works, from the moment damage occurs to the moment your repair is paid in full.
1. Document the Damage Before Anything Else
Before you call anyone, document what you see. Take wide-angle and close-up photos of every visible problem: dents on gutters, dings on the AC unit, torn screens, missing or curled shingles visible from the ground, and any water stains inside. Save screenshots of the storm date and severity from local news or weather apps. If you have hail in the yard, photograph it next to a coin or ruler so the size shows clearly. The clearer your documentation, the smoother the rest of the process. Don’t throw away any damaged property until your insurer has had a chance to review it. This step is the foundation everything else rests on.
- Photo coverage: Wide and close-up shots of every problem area.
- Scale references: A coin or ruler in close-up shots.
- Storm proof: Save screenshots of weather reports for the storm date.
- Don’t toss anything: Keep damaged items until your claim is reviewed.
2. Get a Professional Roof Inspection
Before filing the claim, schedule a free inspection from a reputable local roofer. A trained inspector can spot damage you might miss and document it in a way that supports the claim. Look for a contractor with proper credentials. J-Tech, for example, is a GAF Master Elite contractor, James Hardie Preferred, BBB Accredited, and OSHA Certified — all marks of an established local company. Watch out for storm chasers (out-of-state crews knocking door to door) and “deductible eaters” who promise to cover your deductible. Both are red flags, and deductible coverage offers can violate your insurance policy and put you at risk of fraud. Stick with a licensed local company that has roots in the community.
- Free inspection: Most reputable roofers offer this at no cost.
- Avoid storm chasers: Out-of-state crews often vanish before warranty claims.
- Skip “deductible eaters”: Offering to cover your deductible can be fraud.
- Check credentials: Look for GAF, James Hardie, BBB, and OSHA certifications.
3. File the Claim With Your Insurance Company
Call your insurance company or use their app to file the claim. Have your policy number, the storm date, a brief description of the damage, and your inspector’s findings ready. The insurance company will assign a claim number and connect you with an adjuster, who is the person responsible for inspecting your roof and writing the estimate. Be honest, factual, and brief during this call. Avoid speculating about the cause or making statements like “the roof was probably already old” that could weaken your claim. Stick to the facts of what happened and what you’ve observed. Note the claim number, your adjuster’s name, and any deadlines they give you.
- Have ready: Policy number, storm date, photos, inspection report.
- Stick to facts: Avoid speculation about age or prior condition.
- Write it down: Save the claim number, adjuster name, and deadlines.
- Multiple ways to file: Phone, app, or your agent’s office.
4. Meet With the Insurance Adjuster
The adjuster will schedule an inspection of your roof, usually within 1 to 2 weeks of filing. This visit is the most important step in the entire claim. Have your roofing contractor present during the adjuster’s visit if possible. A professional contractor speaks the same technical language as the adjuster, can point out damage that’s easy to miss, and helps make sure nothing important gets overlooked. Bring all your documentation: photos, weather reports, your inspector’s report, and any notes from prior conversations. After the inspection, the adjuster writes an estimate using software like Xactimate, the industry standard for insurance estimating. Reputable roofing contractors are typically Xactimate Certified, which helps when comparing line items.
- Be present: Show the adjuster every area of concern.
- Bring your contractor: A second set of trained eyes catches details.
- Have documents ready: Photos, reports, and notes from your records.
- Industry tool: Xactimate is the standard estimating software used by adjusters.
5. Review the Insurance Estimate Carefully
A few days after the inspection, your adjuster will send you a written estimate showing what the insurance company is willing to cover. This is where the math gets specific. The estimate lists each line item (tear-off, underlayment, shingles, flashing, ridge cap, dump fees, and so on), then subtracts your deductible and any depreciation. If you have replacement cost coverage, the depreciation comes back to you after the work is completed. If you have actual cash value coverage, you don’t get the depreciation back. Compare the adjuster’s estimate to your contractor’s estimate. If items are missing or under-valued, your contractor can request a supplement. Many reputable contractors have an in-house supplemental team that helps homeowners walk through the estimate and identify gaps.
- Line items matter: Look for tear-off, underlayment, shingles, flashing, and code items.
- Two coverage types: Replacement cost returns depreciation; actual cash value does not.
- Compare estimates: Your contractor’s estimate vs. the adjuster’s.
- Supplements are common: Missing items can be added through a supplement request.
6. Approve the Repair and Schedule the Work
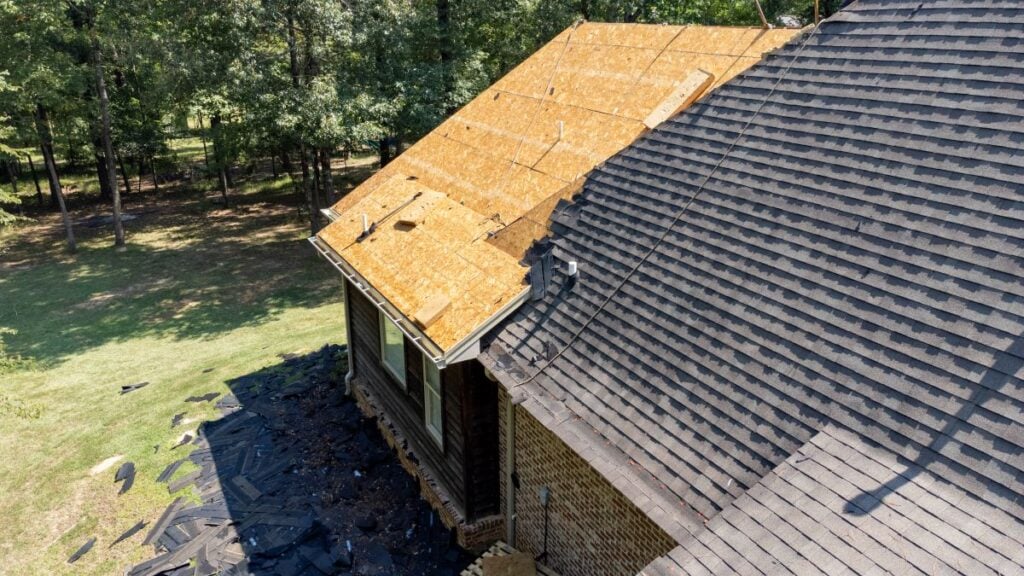
Once you and the insurance company agree on the scope and cost, it’s time to sign a contract with your roofer and schedule the work. Read the contract carefully before signing. Make sure it specifies the materials, the scope of work, the timeline, the warranty, and the payment terms. Avoid signing an Assignment of Benefits (AOB) without understanding it. The NAIC warns that an AOB can transfer your rights as the policyholder to the contractor, sometimes giving them the ability to negotiate or even sue without your knowledge. A reputable contractor doesn’t need an AOB to do quality work. Stick with a clear, signed contract that keeps you in the driver’s seat.
- Read carefully: Materials, scope, timeline, warranty, payment terms.
- Be cautious of AOBs: They can transfer your rights to the contractor.
- Confirm warranty coverage: Both manufacturer and labor warranties.
- Set expectations: Agree on start date and what to expect during install.
7. Final Payment and Closeout
Once the work is complete, the insurance company releases the final payment. If you have replacement cost coverage, this is when the previously withheld depreciation is paid out (called recoverable depreciation). Your contractor sends a Certificate of Completion to the insurance company along with a final invoice. Once everything matches, the second check arrives. You may also need to handle your mortgage company if your home is mortgaged, since insurance checks for major repairs are often made out to both you and the lender. The lender may need to inspect the work before signing off. Save all paperwork from the claim for at least 5 years for tax and future-claim purposes.
- Final inspection: Some insurers re-inspect before final payment.
- Recoverable depreciation: Released after the work is verified complete.
- Mortgage involvement: Lender often co-signs checks for major repairs.
- Save records: Keep paperwork for at least 5 years.
What Does the J-Tech Inspection Process Actually Look Like?
A good inspection is the foundation of a successful insurance claim. The more thorough the inspection, the more accurate the documentation, and the stronger the case for full coverage.
How Does J-Tech Inspect a Storm-Damaged Home?
It all begins with an inspection. Using state-of-the-art technology, drones, and some of the best tools in the industry, the J-Tech team provides a thorough inspection of your home to find damage that’s easy to miss from the ground. An exterior expert walks the property, with same-day inspections available in many cases. Free 3D mapping and drone footage capture every angle of the roof, siding, gutters, and windows, creating a complete record of any storm damage. From there, J-Tech makes sure the insurance company knows about every item found and walks you through any questions you have about the storm restoration process. Once an agreement has been reached with your insurer, the repairs begin. The whole process is built to make a stressful situation as smooth and clear as possible.
- Exterior expert visit: Same-day inspections available in many cases.
- Free 3D mapping and drone footage: Captures damage that’s hard to see from the ground.
- Insurance communication: J-Tech makes sure the adjuster knows about found damage.
- Homeowner walkthrough: Every question gets answered before any work begins.
- Repairs begin: Once you and the insurance company agree on scope.
What Should You Avoid During a Roof Insurance Claim?
A few common mistakes derail otherwise solid claims. Knowing what they look like helps you avoid them.
Where Do Most Homeowners Go Wrong?
The biggest mistakes are signing with storm chasers, accepting an “we’ll cover your deductible” offer, signing an Assignment of Benefits without understanding it, missing the policy’s reporting deadline, and failing to document properly. Each of these can result in a denied claim, fraud exposure, or repairs that aren’t fully covered. Stick with a local, established contractor with strong credentials. Document everything. Read what you sign. Ask questions when something doesn’t make sense. Most claims go smoothly when homeowners take their time, choose the right contractor, and stay engaged through every step.
- Storm chaser warning: Out-of-state crews often disappear after the work.
- Deductible offers: “We’ll cover your deductible” is often insurance fraud.
- AOB caution: Don’t sign away your rights without legal review.
- Stay engaged: The best outcomes come from informed, active homeowners.
Frequently Asked Questions
How long do I have to file a roof claim after a storm?
Most policies have a reporting window of 30 to 60 days, but some are shorter. Statutes of limitations on filing vary by state, often 1 to 2 years from the date of loss. Always check your specific policy and contact your insurer as soon as you suspect damage.
Will filing a claim raise my insurance rates?
It depends on the carrier, the type of claim, and your claim history. Single weather-related claims often don’t trigger rate hikes, but multiple claims in a few years can. Talk to your agent about how a claim might affect your specific policy.
What’s the difference between replacement cost and actual cash value?
Replacement cost coverage pays to replace your roof with materials of similar kind and quality. Actual cash value pays the depreciated value, which is usually significantly less. Always confirm which type your policy provides before damage occurs.
What if my claim is denied or underpaid?
You have the right to appeal. Provide additional documentation, request a re-inspection, and ask your contractor to file a supplement. If that doesn’t resolve it, you can hire a public adjuster or contact your state insurance department to file a complaint.
Should I get multiple estimates for my roof?
Most insurance companies don’t require multiple estimates. What matters is choosing a contractor with a strong reputation, proper licensing, and experience handling insurance claims. One reputable, well-credentialed contractor is usually enough.
Can my contractor talk to my insurance company directly?
Yes, with your permission, your contractor can discuss the claim with your adjuster. This is helpful for resolving estimate differences and identifying missed items. Just be careful before signing any document that gives a contractor authority to act for you, like an Assignment of Benefits.
Why Choose J-Tech Construction & Solar After Storm Damage?
J-Tech Construction & Solar is the trusted name for storm-damaged roof restoration in Bellevue and surrounding areas because of more than 20 years of construction experience, a family-owned and locally operated team, and the credentials to back up the work: GAF Master Elite, James Hardie Preferred, BBB Accredited, OSHA Certified, EPA Lead-Safe Certified, and Xactimate Certified. Every storm restoration starts with a free inspection, including 3D mapping and drone documentation to identify damage that’s easy to miss from the ground. The in-house supplemental team helps homeowners review insurance estimates and flag gaps, while the in-house customer service team keeps you informed every step of the way (bilingual reps available). J-Tech is not an insurance agent or adjuster, but works alongside homeowners to make sure damage is properly accounted for.