When installing standing seam or concealed fastener panels, using the right metal roofing clips is essential for long-term performance. These small yet vital components allow panels to expand and contract with temperature changes while staying firmly attached to the roof deck. For contractors and property owners in Lincoln and surrounding areas, understanding how metal roofing clips work, and how to install them correctly, can prevent leaks, buckling, and premature wear.
- Purpose: Secure metal panels while allowing natural thermal movement.
- Durability: Prevent fastener stress and ensure watertight seams.
- Longevity: Proper clip installation extends the lifespan of the entire roof system.
What Are Metal Roofing Clips?
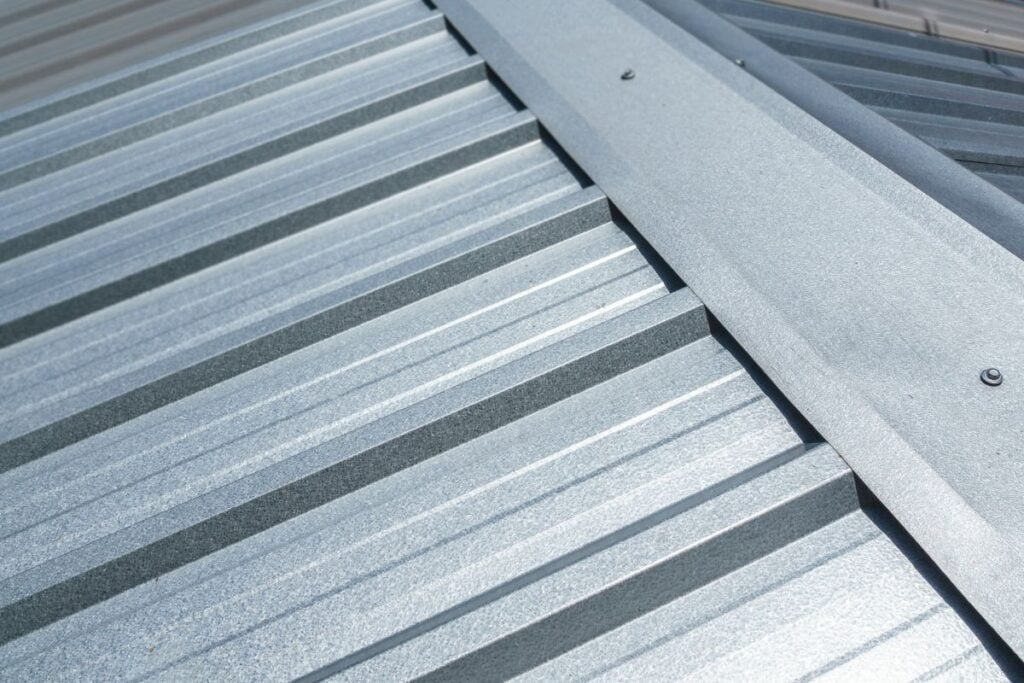
Metal roofing clips, also known as panel clips or fastener clips, are specialized metal brackets designed to attach standing seam panels to the roof deck or substrate. Instead of driving screws through the panels themselves, clips secure them from the side or underneath, eliminating visible fasteners and reducing potential leak points.
In Lincoln and surrounding areas, where seasonal temperature swings are common, metal roofing clips play a crucial role in preventing panels from shifting, warping, or loosening over time. They balance flexibility with stability, allowing the roof to expand and contract naturally.
How Metal Roofing Clips Work
Clips act as a connector between the panel and the roof substrate. They’re typically fastened to the deck, and the metal panel locks into place over the clip. This floating design enables controlled movement during expansion and contraction cycles, minimizing stress on seams and fasteners.
Because different roofing systems require different clip types, it’s important to match the clip style to your specific panel design and roof slope.
4 Types of Metal Roofing Clips
Each type of clip is engineered for particular panel systems and environmental conditions. Choosing the right one ensures structural integrity and optimal performance.
1. Fixed Clips
Fixed clips secure the panel tightly to the deck without allowing movement. They’re commonly used on smaller roofs or areas with minimal thermal expansion.
- Advantages: Simple design and lower cost.
- Limitations: Not ideal for long panel runs or regions with wide temperature fluctuations.
- Best For: Short panels under 30 feet or residential applications.
2. Floating (Expansion) Clips
Floating clips are designed to slide slightly within a slotted base, accommodating panel movement as temperatures change. They’re preferred for large commercial roofs and long panels.
- Advantages: Prevents buckling and panel distortion.
- Performance: Allows smooth expansion and contraction without stress on fasteners.
- Best For: Long panel runs, standing seam roofs, and commercial buildings.
3. One-Piece Clips
These clips have a single integrated body that attaches directly to the panel seam. They’re typically used for mechanically seamed systems where the clip becomes part of the locked seam.
- Advantages: Simple and efficient for high-volume installations.
- Durability: Offers excellent strength once seams are crimped.
- Best For: Standing seam systems with tight seam profiles.
4. Two-Piece Clips
Two-piece clips consist of a base plate fastened to the roof and a movable top piece that attaches to the panel. This design allows both stability and flexibility during thermal cycles.
- Advantages: Balances secure attachment with freedom of movement.
- Durability: Performs exceptionally well under Nebraska’s temperature swings.
- Best For: Long-span standing seam panels or low-slope commercial roofs.
4 How to Install Metal Roofing Clips
Installing clips correctly ensures the roof performs as intended. While specific requirements vary by manufacturer, the general process includes several key steps.
Before we explore these steps, it’s important to note that clip installation must always follow manufacturer guidelines and structural engineering specifications. Proper placement, alignment, and spacing ensure optimal panel movement and weather resistance.
1. Prepare the Roof Deck
Start with a clean, dry, and level deck. Inspect for protruding nails, moisture, or damaged areas that could interfere with clip placement.
- Underlayment: Install high-quality synthetic or self-adhering underlayment before attaching clips.
- Layout Planning: Mark panel lines and clip positions for consistent spacing.
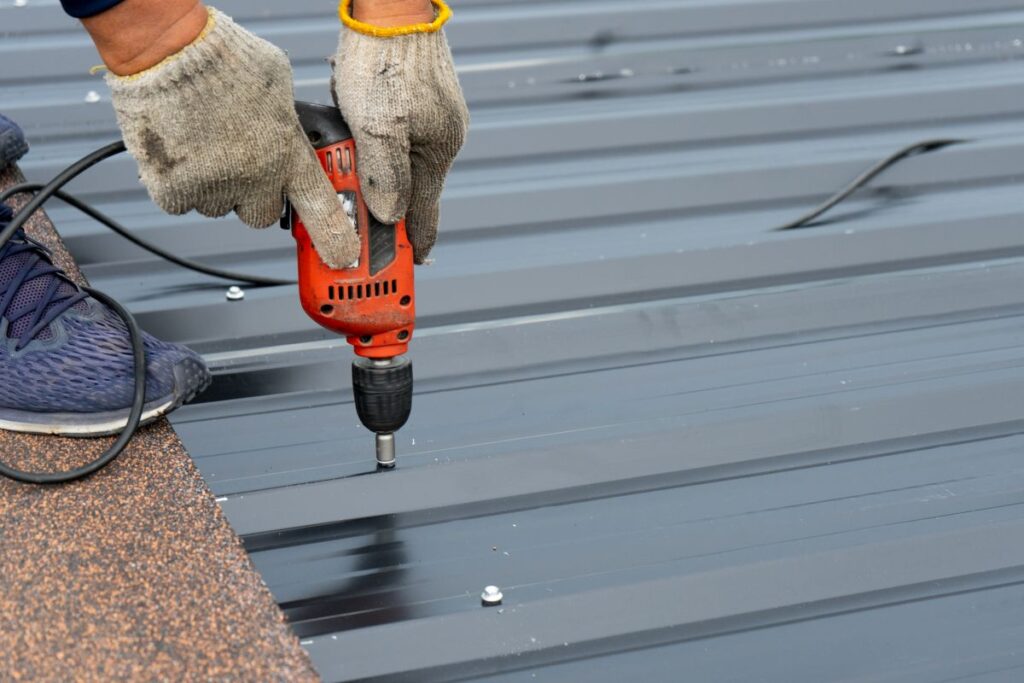
2. Attach Clips to the Deck
Fasten each clip using corrosion-resistant screws or fasteners recommended by the panel manufacturer.
- Spacing: Typical spacing ranges from 12 to 24 inches, depending on panel width and design.
- Alignment: Ensure clips are perfectly straight to prevent uneven seams.
- Secure Fastening: Tighten screws enough to hold the clip firmly without distorting the base.
3. Snap or Lock Panels Into Place
After clips are secured, position the first metal panel and engage it with the clip. Continue installing subsequent panels, locking each one into the next clip until the entire row is complete.
- Mechanical Seams: For mechanically seamed systems, use a crimping tool to lock seams and secure clips permanently.
- Snap-Lock Systems: For snap-lock designs, press panels firmly until they click into place over the clip.
4. Check for Proper Movement
Once installed, inspect the panels to ensure they can expand and contract freely. Gently push or pull a section to confirm movement.
- Thermal Testing: Check clips at both low and high points to ensure flexibility across the roof.
- Final Adjustments: Replace misaligned clips before completing installation.
Common Installation Mistakes to Avoid
Improper clip installation can lead to leaks, buckling, or even structural damage. Avoid these common errors to maintain long-term performance.
- Incorrect Spacing: Placing clips too far apart can cause panels to lift in strong winds.
- Over-Tightening Fasteners: This restricts thermal movement and increases stress at seams.
- Misalignment: Uneven clips lead to visible panel distortion.
- Mixing Clip Types: Always use clips specifically designed for your roof system.
Benefits of Proper Clip Installation
When installed correctly, metal roofing clips contribute significantly to a roof’s durability and lifespan.
- Thermal Movement Control: Prevents stress cracking and fastener failure.
- Enhanced Wind Resistance: Keeps panels secure during severe storms.
- Leak Prevention: Maintains watertight seams and consistent panel alignment.
- Aesthetic Consistency: Ensures panels stay smooth and uniform over time.
Maintenance Tips for Metal Roofing Clips
While clips are mostly hidden beneath seams, occasional maintenance helps ensure long-term performance.
- Inspect Annually: Check for loose fasteners or signs of rust.
- Clean Debris: Remove dirt and leaves that trap moisture near clips or seams.
- Monitor Expansion: Look for movement restrictions caused by sealant buildup or corrosion.
- Re-Tighten if Necessary: Replace missing or corroded fasteners to maintain strength.
Why Quality Matters
High-quality clips made from stainless steel or galvanized steel offer the best protection against corrosion and movement failure. In Nebraska’s changing climate, choosing durable clips prevents premature wear and costly future repairs.
- Corrosion Resistance: Stainless steel or aluminum-coated clips perform best in humid or snowy regions.
- Compatibility: Match clip material with panel metal to avoid galvanic corrosion.
Reliable Roofs Start With the Right Clips
Installing the right metal roofing clips is a small detail that makes a big difference in roof longevity and performance. Properly secured and spaced clips prevent leaks, panel distortion, and fastener stress, ensuring your roof performs beautifully for decades.
For property owners in Lincoln and surrounding areas, J-Tech Construction & Solar provides expert guidance and professional roofing installation built to last.
Contact J-Tech Construction & Solar today for a free estimate and learn how our experience with precision metal roofing installation can keep your property protected year-round.