If you’ve been wondering how to install metal roofing on your home, you’re not alone. Metal roofs are becoming increasingly popular among homeowners due to their durability, sleek appearance, and energy efficiency. Plus, the longer lifespan of metal roofs compared to other materials makes them a smart investment.
Before jumping into a project like this, it’s important to know what to expect. Installing metal roofing can be a rewarding DIY project, but it requires the right tools, materials, and some knowledge of roofing basics. Here’s what makes the process worthwhile:
- Metal roofs can last 40-70 years with minimal maintenance.
- They’re energy-efficient, reflecting sunlight and reducing cooling costs.
- With a wide array of styles, including shiny corrugated metal roofing or standing seam panels, there’s a look for everyone.
Now, let’s walk you through the process. Below, we explain everything you need to know about metal roofing installation in 7 easy steps. By the end, you’ll understand the materials, techniques, and safety considerations necessary to get the job done.
🤔 What You Need to Know Before Installing Metal Roofing
Before we break down the installation steps, it’s critical to properly prepare for the task. Installing a metal roof involves more than just securing panels. It’s about ensuring your roof is equipped to handle the upgrade and will perform optimally for years to come. If you’re curious about how metal roofing interacts with temperature and energy efficiency, this guide on metal roofing and heat explains what homeowners should expect throughout the seasons.
Tools and Materials You’ll Need
To get started, gather these essential items:
- Aluminum or steel panels (e.g., corrugated metal roofing or standing seam panels)
- Metal roofing screws with rubber washers
- Underlayment or roofing felt
- Ridges, trims, and flashing for waterproofing edges
- Drill, screwdriver, and metal snips
- A tape measure, chalk line, and level
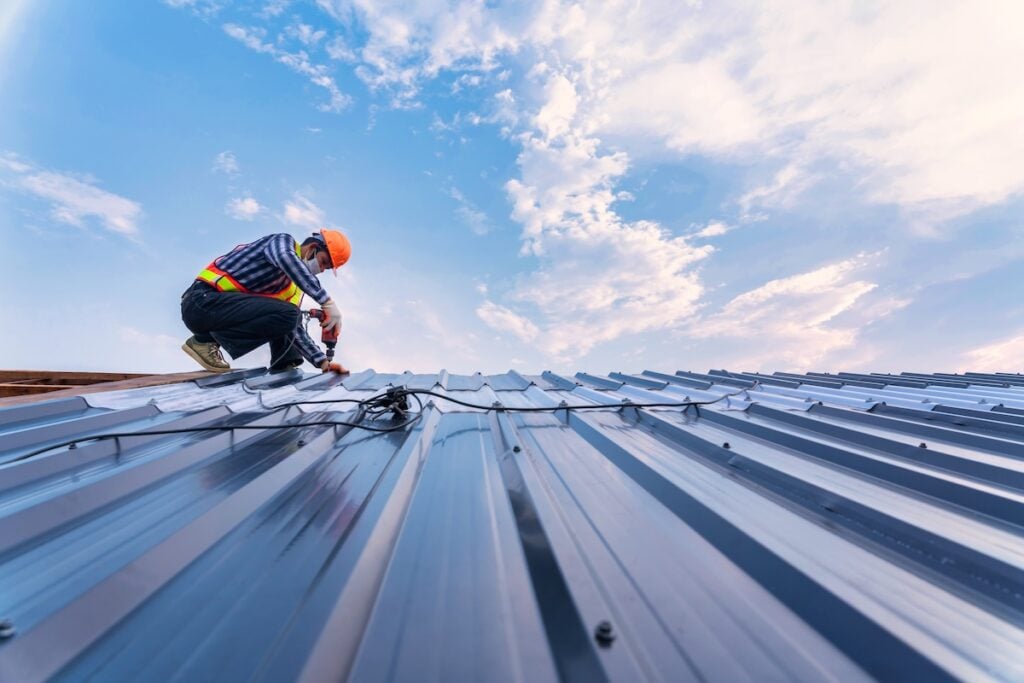
Additionally, always wear appropriate safety gear. A fall protection system, gloves, and sturdy boots are a must when completing work on a roof.
Preparing the Roof
To extend the lifespan of your new roof even further, it’s worth learning how to care for it after installation—this article on maintaining a metal roof covers essential upkeep tips that prevent premature wear and costly repairs.
You can’t install new roofing effectively without prepping the surface:
- Inspect and Clean: Ensure the existing roof deck is free of debris, rot, or damage. Remove old shingles if needed.
- Install Underlayment: A high-quality underlayment provides a moisture barrier beneath the metal roof. Roll it out, overlapping seams by 6-8 inches to prevent leakage.
- Measure Areas: Measure your roof sections carefully to ensure each panel fits properly. Panels that fit correctly avoid gaps and enhance your roof’s longevity.
📋 Step-by-Step Guide to Installing Metal Roofing
Now that you’re prepared and know what you’ll need, it’s time to get into the core steps of how to install metal roofing. Carry out these tasks systematically for the most secure and effective results.
1. Measure and Order Your Panels
The first official step in metal roofing installation is making sure your materials are custom-fitted for your roof.
- Measure the roof’s length and width, accounting for angles and overhangs.
- Order panels at least 2-4 inches longer than your roof’s dimensions to allow for proper overlap and run-off.
It’s always better to have materials cut slightly larger during manufacturing to ensure you don’t come up short during installation.
2. Prepare for Panel Placement
Before placing the first panel, mark your rooflines to keep everything straight and aligned.
- Use a chalk line or straight edge to create guide marks.
- Start at the lower corner of your roof and work your way upward.
- Lay a roof drip edge along eaves to help redirect water.
Correct alignment from the start will prevent headaches later in the process.
3. Attach the First Row of Panels
This is where the transformation begins! Most people find this part the most exciting because their roof starts to take shape.
- Place the first metal panel over your designated starting point, overlapping the drip edge slightly.
- Ensure the panel’s ridges run perpendicular to the roof edge.
- Secure the panel with metal roofing screws, but avoid overtightening the fasteners, as this can damage the washers.
Straight, secure placement is critical to long-term roofing performance, so go slowly and double-check your alignment.
4. Work Upward in Successive Rows
After the first panel is secured, install the following rows by repeating the process.

- Overlap Panels Correctly: Each row should overlap the previous panel by at least 1-2 inches to ensure water resistance.
- Add Fasteners Appropriately: Use metal screws with washers at every 12-24 inches along the panel ribs. Always fasten on the “flats” (the areas between the ridges).
This method keeps the panels secure in bad weather and ensures minimal leaks.
5. Install Ridge Caps and Flashing
No metal roofing installation is complete without finishing touches to protect your roof’s edges and seams.
- Ridge Caps: Secure metal ridge caps along the roof’s peak to shield it from rain or wind. These should overlap the panels by 2-4 inches.
- Flashings: Install metal flashing around chimneys, vents, or skylights. This provides another barrier against leaks in areas vulnerable to water intrusion.
Ignoring these details risks water damage over time, so they’re worth doing right.
6. Inspect and Seal
Conduct a thorough inspection. Address any misaligned panels or loose screws you may have overlooked during installation. After adjustments, apply waterproof sealant at seams, edges, and screw holes to increase weather resistance and prolong the roof’s life span.
7. Final Steps and Cleanup
Congratulations, your metal roof is nearly complete! Wrap up your project with these final measures:
- Clean the roof to remove debris, stray fasteners, or cutting scraps.
- Install gutters if necessary to control rainwater flow off your new roof.
- Test the roof by spraying water and checking for leaks.
With this last step, your roof is ready to protect your home for decades.
✅ Is DIY Metal Roofing for Everyone?

Now that you understand how to install metal roofing, it’s time to decide whether this is the right project for you. While many homeowners find satisfaction in accomplishing this task themselves, metal roofing installation can be challenging, especially for steep or multi-tiered roofs. If you live in or near Omaha, working with a local roofing expert ensures your metal roof is installed correctly, safely, and in compliance with regional building requirements.
For those who aren’t confident about tackling such a significant project, partnering with professionals is a wise choice.
⭐️ Why Choose J-Tech Construction & Solar?
When it comes to installing a metal roofing system, J-Tech Construction & Solar is the team you can trust. Residents in Papillion trust J-Tech Construction & Solar for precision craftsmanship, durable materials, and a stress-free roofing experience from start to finish. Here’s why:
- Expertise: Our roofing experts have years of experience handling both straightforward and complex installations.
- Quality Materials: We source only the best materials to ensure your roof withstands the test of time and weather extremes.
- Customer Care: Your satisfaction is at the heart of what we do. From consultation to post-installation cleanup, we’re here to make the process simple and stress-free.
If you’re ready to switch to a durable, energy-efficient metal roof, reach out to us today. Our team provides professional guidance and dedicated services that homeowners love. Our team proudly serves customers throughout Bellevue, delivering high-quality metal roofing systems designed to handle Nebraska’s changing climate while boosting curb appeal and long-term value.
Take the next step toward your dream roof. Contact J-Tech Construction & Solar today!